Bu Blogda Ara

24 Haziran 2021 Perşembe

IMEI VE EFS NEDİR NEDEN YEDEĞİ ALINMALIDIR ?


Merhaba Mi fanları


IMEI - International Mobile Equipment Identity kelimelerinin kısaltılmışıdır ve de Uluslararası Mobil Telefon Kodu olarak bilinir. Bütün ülkelerde her GSM cihazın bir IMEI numarası vardır ve aynı zamanda bu numara tekdir. Cihazınızın IMEI numarasını cihazın arka kapak içindeki plakada, ürünün faturasında (Türkiye’de faturaya yazılmak zorunda) ya da arama ekranında *#06* tuşlayarak öğrenebilirsiniz.
EFS - (/efs) ‘nin açılımı Encryption File System olup, işlev olarak içerisinde telefona özel bilgilerden cihazınıza ait olan IMEI, network MAC adresi ,ürün kodu gibi bir takım cihaza özel bilgilerin saklandığı bölümdür (partition). Bu klasör Custom rom yüklemeleri ve firmware yüklemeleri vs gibi işlemler esnasında zarar görebilir, silinebilir yada değiştirilebilir İşte bu bölümün bozulması yahut silinmesi telefonunuzun söz konusu bilgilerinin kaybolması anlamına gelir ve bu durumda telefonunuzun IMEI ‘si 00000 veya null olarak gösterilir ve şebekeye erişilemez. Böyle bir durumda yapılabilecek tek şey teknik servisten yardım almaktır.
Böyle bir duruma düşmemeniz için bu partisyon yedeğini önceden alırsanız daha sonra olası bir problemde geri yükleyerek sorununuzu kendiniz çözebilirsiniz.
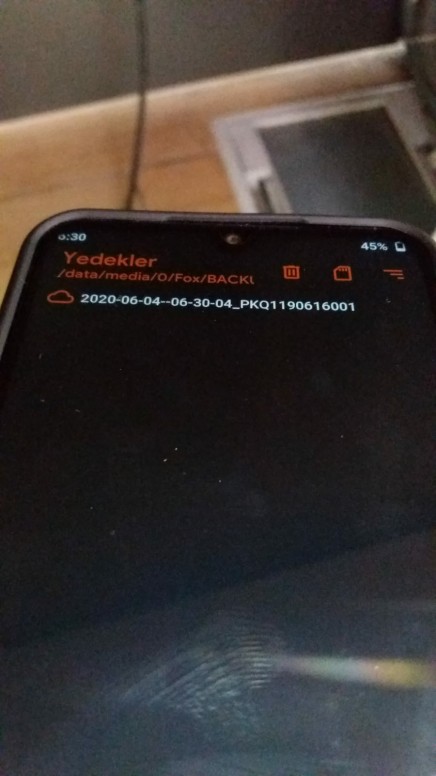
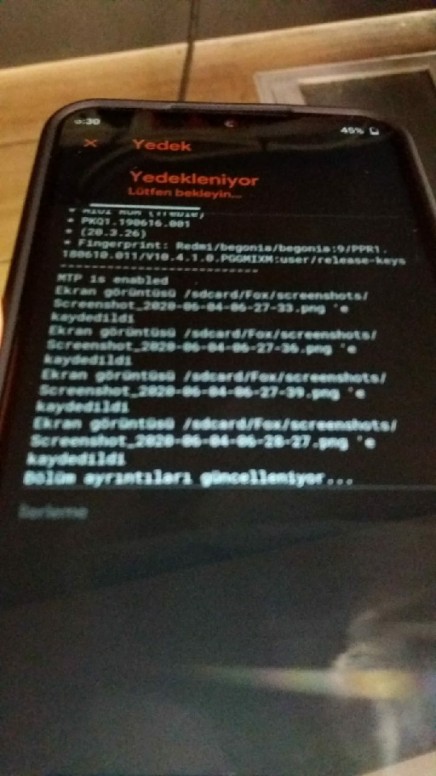
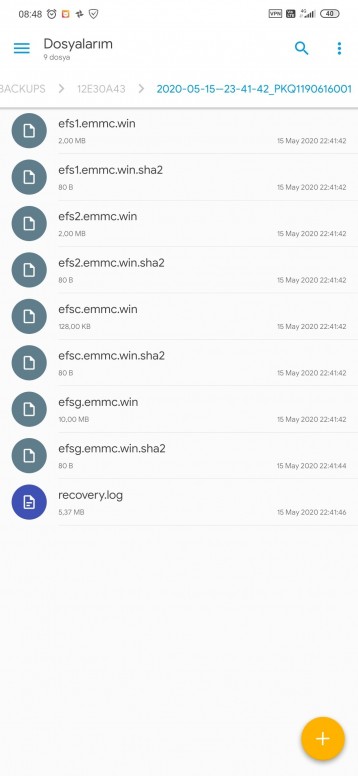
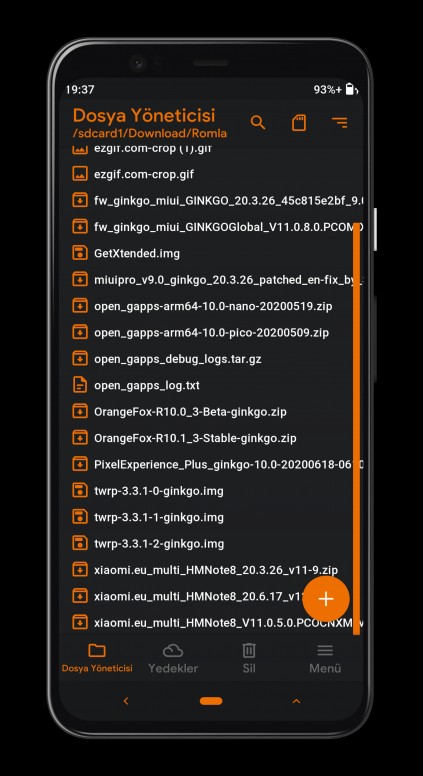
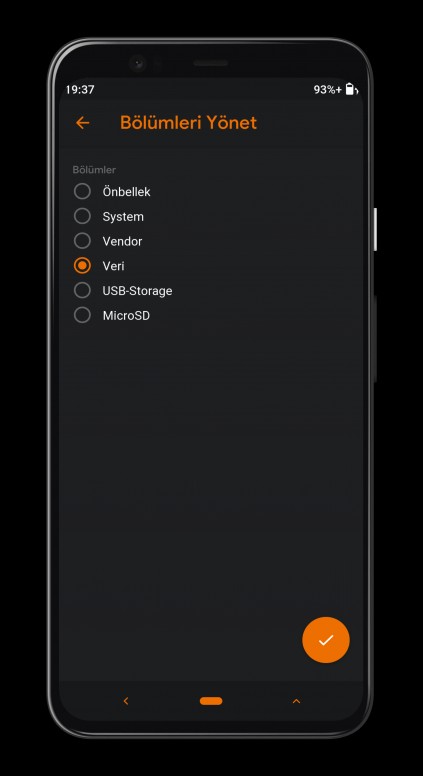
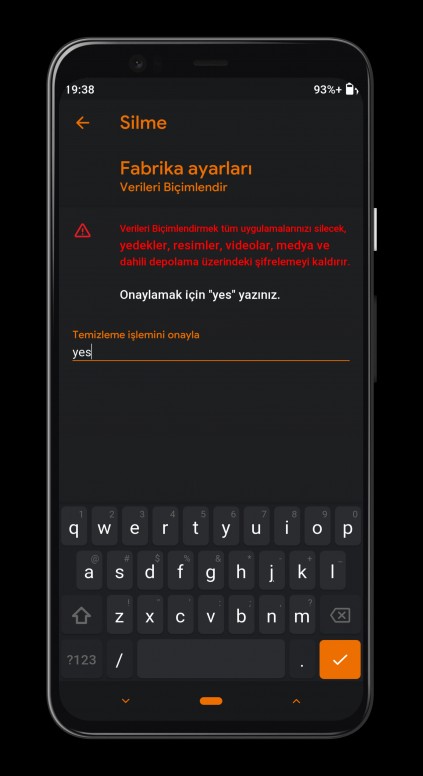
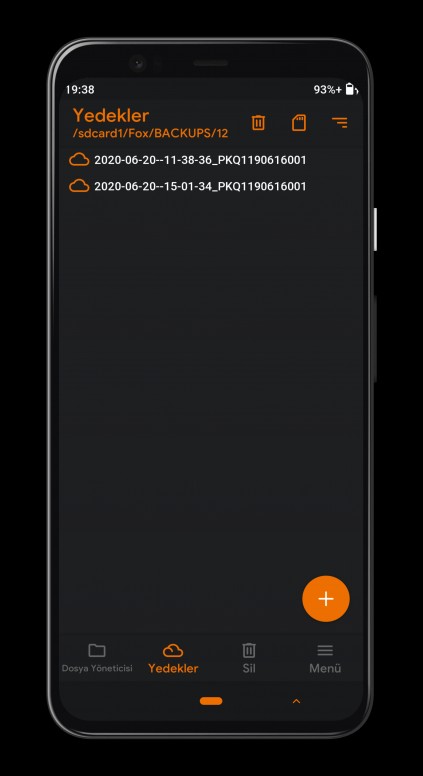
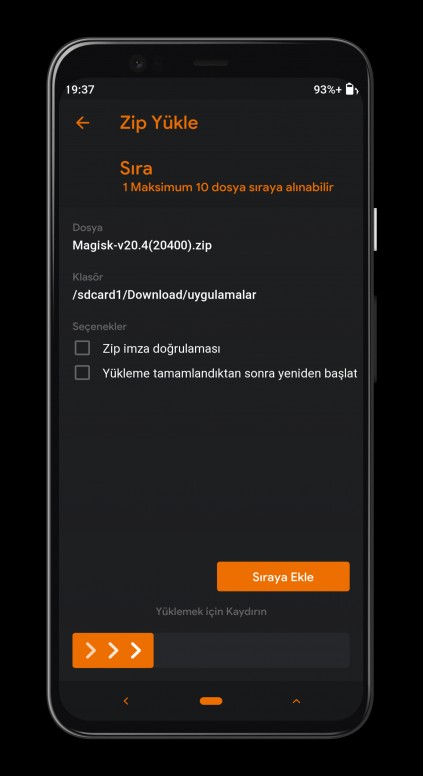
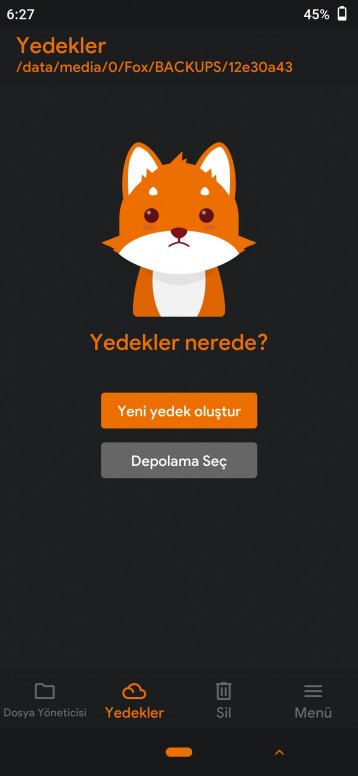
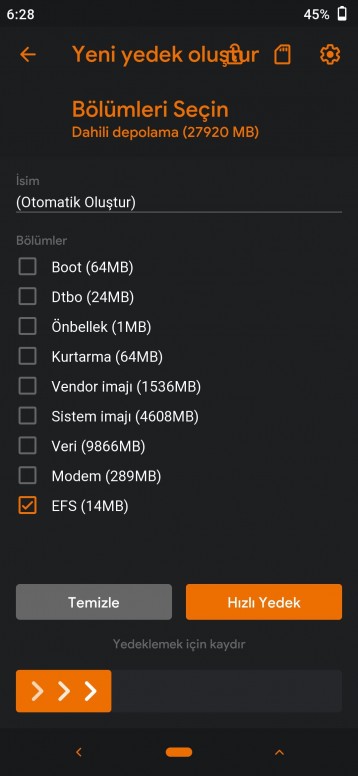
Aşağıdaki resimlerde görüldüğü gibi, TWRP ye girip, yedekle bölümünden EFS si işaretleyip, yedek alın ve bu yedeğinizi saklayabileceğiniz sağlam bir yere kopyalayın (Ben PC de ve hafıza kartında saklamaktayım)
Bu arada ben recovery olarak Fox kullaniyorum 5-6 çeşit bildiğim recovery var TWRP en bilinen.

(Recoveryler için de ayrı bir konu açmayı düşünüyorum destek ve ilgi olursa teşekkür ederim)
avatar.png avatar.png avatar.png avatar.png
İşte yedeği alınmış bir IMEI avatar.png


Unutmayın yaşamak dahi risktir Okuyun araştırın bilgi çağındayız Korkmayın sorun (saçma sapan paylasimlara olan ilgi malesef gerçek bilgi içeren paylaşımlara olmuyor) 

HELLO EVERYTHING ABOUT MIUI GLOBAL AND CUSTOM ROMS


Hello fans

There is a lot of sharing about rum in the form, mostly in the global series India Indonesia Italy Europe and Global but there are many other improved simplified roms available. I will tell you about custom roms. First of all, I would like to point out that all miui roms come from the Chinese beta version.
Particularly, we all frequently come across in the forum, our new joining friends or followers of our forum, but who want to start these works, are bored with the Global Stable rum offered by Xiaomi company on Xiaomi devices and watched on Youtube; Our friends who want to wonder and set up Xiaomi.eu, Miui Pro, Mi-room and some Aosp roms become a member of our forum after watching the videos or they are already members and open a topic for help.

However, while some of them have little experience, the remaining group does not even know what Rom means. Based on this, I wanted to open this subject and explain each stage in detail, especially for our new friends who came to the forum, and to indicate their risks, and what the results may have.

If you're ready, let's start
First of all, what is Rom?
It is the operating system software of smartphones or tablets using the Android operating system. Android ROM (Read Only Memory) software is located only on the disk space inside the devices that can be read. Devices with all Android operating systems are delivered to the user with the original ROM developed by the manufacturers.

★ (excerpt from wmaraci site)
What is Custom Rom?
Using Custom ROM (Developer Software) means preferring different customized infrastructures as operating system beyond the Android operating system that comes with us. These operating systems called Custom ROM are preferred because they provide different advantages even though they mainly use Android infrastructure.

Freedom of personalization and security

While our mobile phones are now a part of our lives, we also want them to reflect our personality. I mean, would it be okay if they carried something from us, reflected in our color? Of course not. Custom ROMs give us the freedom to get rid of the cliché character of Google's Android operating system. We can enrich our device interface with different options by using themes, we are not doomed to the limited world of themes.
No more bloatware shortages
Because the Google Android operating system is open source, it can accommodate different and useless applications that are tampered with by OEM phone manufacturers and embedded in the operating system of these companies. Sometimes the number of these applications is so high that they also affect the performance of the device. It is not possible to uninstall or stop these applications called bloatware most of the time. Therefore, using Custom ROM is a preferred situation for users. Because they don't have any extra software. You can load what you want according to your own head.
Devices have a longer life
When you buy a computer, you have a chance to replace the old components. However, you do not have such a chance for smartphones. Almost every smart device can be used for a maximum of 2 or three years. This situation causes the Android device users, whose updates are already late, to be sentenced to the same operating system. Custom ROMs can be updated at any time. Thus, the possibility of being obliged to the same operating system is eliminated. You can use a phone for years. On the other hand, Android's vulnerabilities are now "legendary". Custom ROMs do not experience this problem. Threats targeting the Android infrastructure do not affect Custom ROMs. Note that Android phone manufacturers are not sending new Android versions to phones, because the device is not able to uninstall this update, because they are choosing to market this update with a new device. Custom ROMs do not have such a problem, you can always access the latest versions.
Open source applications
You can have a faster and more functional smartphone by using open source applications with Custom ROM. With the Android Open Source Project called AOSP, you can access many open source offices, browsers, messaging or similar applications.
★ (Taken from Tamindir Site)
So far, I have tried to give you information about what Rom means and what the Custom rom we want to install, guys, if you have come here and want to continue your process, let's talk about the necessary things and things to do to install Custom Rom on your Xiaomi device.
What is Bootloader Lock?
Bootloader is a security measure designed to prevent any external interference to Xiaomi devices. Thanks to this security measure, the originality of the devices was requested to be preserved. In other words, spyware etc. in the devices sold by intermediary companies. They have resorted to this method to prevent installation of such applications. If Global ROM is installed on these devices, it is not necessary to open this lock under normal conditions. However, it is recommended to install Global ROM on devices with Chinese ROM installed, turn on root access to Devices and open this lock for changes such as IMEI.
★ (excerpt from faqphone.com site)

How to Unlock Bootloader?

(It is recommended to charge the device more than 50% in all operations after this stage!)
A computer is absolutely necessary for these processes, do not start operations without it!

In addition, back up your data will be deleted. To unlock our device, we need to make some settings on the device, such as adding the device to the mi account and unlocking the oem,

Then we go to the computer and download the necessary program by pressing the Unlock Now button on this Site. Driver must also be installed on the device, but since it varies from device to device, I am not explaining it. Then we run the descending program, it will ask you the account. This mi account must be the same as the mi account you added to the device, then scroll through the screen. In this menu, we need to turn off the device and put it into fastboot mode, which will ask you to connect the device. While the device is off, hold down the Volume Down Power button and a screen will open, then you will connect the device to the computer and press the Unlock button and the processes will start. However, here is additional information that I need to specify, if you are lucky, the lock will be opened at once. However, it usually requires you to wait for hours like 168/360/720 and try again. So why ? When this lock is unlocked, the device actually has a security measure reduced. Xiaomi also gives this time to protect theft and privacy.

Let's say that the lock was not unlocked and gave us one of the times I specified.

Do not do when an update is received over Ota.

Trade with the same Mi account Unless necessary, try not to change your password or change your username.

Find my device Do not switch on / off.

Do Mi Cloud synchronization occasionally. Log in to Mi Cloud via the browser.

Try not to use a different Computer or operating system.

Try not to use a different version Unlock tool.

Do not use a different sim card, do not change the Sim Slot. Do not carry out line transportation.
Let's say the lock has been opened, now we are going to the next stage.
What I want you to know before these processes is that your device goes into the mode we call Brick as a result of a wrong operation, so what is Brick?

Brick is usually the result of user-critical actions on the device. For example, when you try to install an operating system or ROM version that is incompatible with the motherboard on a phone with Android operating system, your phone becomes Brick and completely disables its basic functions. The phone with a brick does not respond to most systemic interventions and the device must be repaired by a specialist authorized service to recover the device.
Recovering a bricked smart device is completely proportional to luck. Sometimes a mild silence condition called Soft Brick occurs on the devices. In such cases, by making a few minor changes to the system software, clean software can be installed and the device can be recovered. If the device is Full Brick or Half Brick (Half Brick), recovery is very difficult. Devices in this situation are intervened hardware -ally as well as systemic interventions. Therefore, if the device is at Full or Half Brick stage, it should be repaired by the authorized service.
There is always the possibility of a device with a brick being recovered, but the recovery of these devices is never precise. It is always possible to talk about the possibility that the device cannot be recovered after the operation performed by the authorized service.
★ (excerpt from wmaraci site)
Stock MIUI Global and Beta Roms
CHINA STABLE
This ROM is only for use in China
Revolution OS

Revolution OS; Spanish developers claim that the MiUI China (China) Beta is Custom ROM, based on weekly ROMs, that allows you to take full control of your device's performance, aiming to deliver uninterrupted performance with even more in-depth optimizations.

Infrastructure;
- China Beta

- Multiple Languages ​​(starts in Spanish at startup)

- OTA Updates

- HOST File (to block ads)

- Anti-RollBack

- Installing Third Party Themes

- Hardware Optimization (For a smooth use)

- Battery Optimization (so that your eyes are not on the battery indicator)

- More will be added, you can be sure.

Miui TR Rom avatar.png
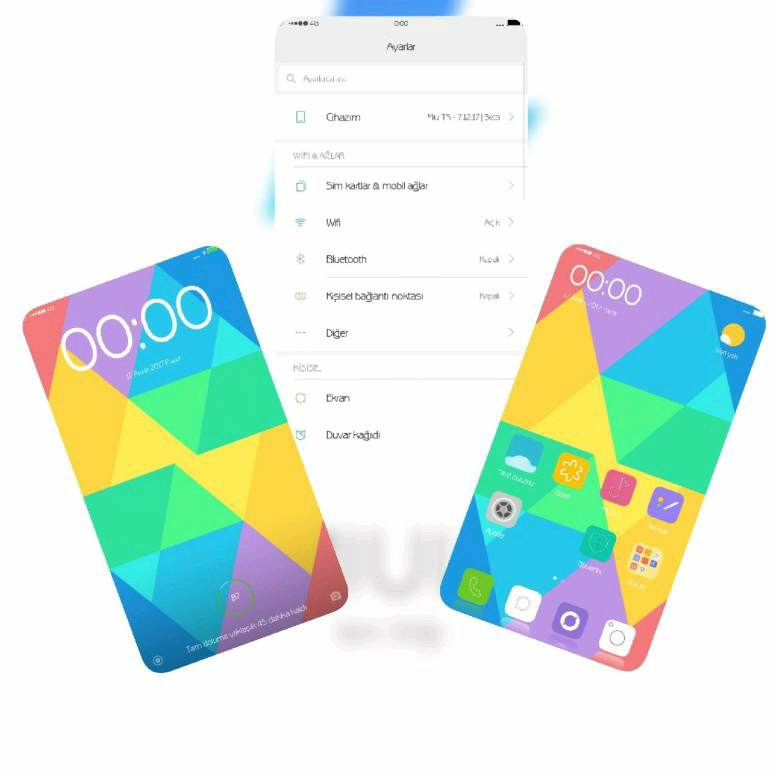
Images and sounds:
* Welcome screen changed

* Search screen is colored

* Search screen avatar enlarged

* Notification bar centered and icons changed

* Wallpapers have been changed

* Added icons to additional settings

* Lock screen clock view has been changed

* Messages view has been changed

* Sounds changed

* Icon pack has been changed

* Recent apps window edges are set round

* Default theme view has been changed

* Whats App view changed [First in Miui Roms]

* Added flu effect in power menu, notification shade and recent apps section
System:
* Rom flashing speed under 30 seconds

* Search type icons fixed

* Home screen layout option added

* Auto-close open folders added

* My documents were enabled initially [Android7]

* Standby screen drop shadows are enabled

* Added support for adding 6 icons to standby screen location

* Status bar search box removed

* Status bar horizontal panel expanded (Full screen)

* Status bar layout set to 5x3

* Hidden menus are activated

* New options have been added to the power menu

* AGps settings added

* Weather morning report date fixed

* Signature protections are closed

* Camera has been improved

* Lock screen left section icons changed

* Double click sleep feature has been added on lock screen

* Folder layout is set to 4x4

* The option to turn off notifications for protected system apps has been activated

* Headphone level alert turned off

* Users section added

* Added more detailed adjustment of the volume (increased from 15 to 30)

* Sim status option added

* Sms UTF8 support enabled

* Preferred network types have been developed

* Themes content is all free

* The keyboard was closed on the first login after entering the phone application

* T9 Turkish character added

* Turkish language added (95%)

* Fonts added

* Converted from Odex Rom to Deodex Rom

* Boot controls closed

* USB connection option added

* Face recognition added

* Wifi wireless network area has been improved
Added applications:
* System applications have been updated (Browser, Files, Videos)

* Google services added (Play Store only)

* Xperia keyboard
Applications removed:
* Chinese apps removed

* Excess applications in the system have been removed
miuimix
avatar.png

MiuiMiX Rom is a new custom ROM based on Xiaomi.Eu with smoother, softer and better battery life, optimized from EU rum. Weekly update is provided.
Your device's Bootloader Lock is on, TWRP Recovery must be installed.
Note: The update may be delayed for some devices.

You should install the Roms with OrangeFox or Twrp, where the MiuiMix team is released.


Miui Pro ROM
avatar.png

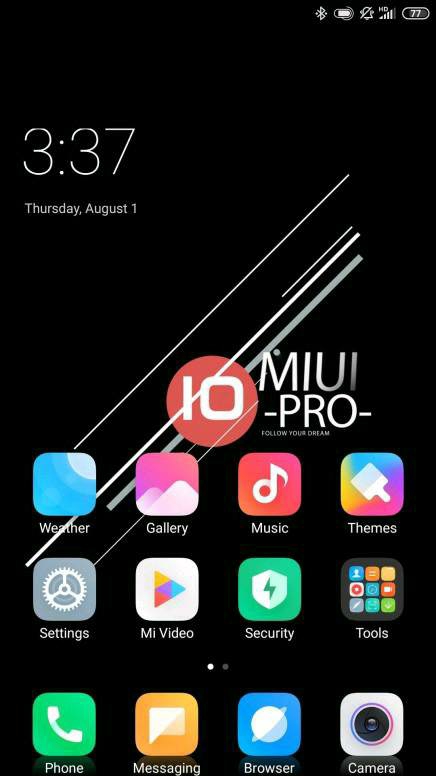
Although the ROM uses the Chinese beta infrastructure, Turkish is available. Since China is beta, you can get the newest features in the fastest way. The makers of the ROM are Russian. Let me mention the basic features.
There are extra optimizations for the battery,

- There is an advanced Reboot menu (Recovery and Download menu appears when you hold the Power button)

-You can install themes out of the store,

-When you slide the notification bar, your location and weather are displayed,

-The icon showing the battery level can be hidden (A feature I like. I leave it only in the form of a percentage. The narrow notch part looks better)

-Double click and screen off and on. Normally there is opening but no closing.

-VoLTE and VoWifi sounds open and active. You have to write code in other roms.

Magisk Manager is actively installed in it,

-Vibration prevention mode active,

There are 10 different list animations,

-Face recognition is active,

-Screen duration application is available. It seems how much time you take in which application,

-Over battery saving mode is active,

-You can hide icons such as 4G, bluetooth, vpn, gps, alarm, headset in the status bar,

Notifications can be set up in the status bar for up to 10 seconds,

-The clock size and battery percentage size can be changed,

No unnecessary applications,

-Interface is much more fluid and reactive,

-The preloaded keyboard is very good,

Many customization and improvements that I haven't noticed yet.
Mi room
avatar.png

It is based on the official Chinese versions of MIUI, where the Xiaomi development team works. Chinese versions of MIUI are updated more frequently than global versions, they work in more detail, and are not overloaded by unnecessary customization due to the occurrence of many critical errors.

MIUI Mi Room updates are published on the site from Friday to Monday after the official release, and only on devices where the official Chinese MIUI update is released and it is possible to test the firmware.
EU Beta / Stable Rom
avatar.png

Xioami.Eu rum is a weekly customized Rom based on a Chinese developer base with Custom custom flavor, with many customization options.
Your device's Bootloader Lock is on, TWRP Recovery must be installed.
Xiaomi.eu ROM basic Features:
Search active in the status bar

Search gesture enabled on desktop (swipe upwards)

Enabled MiDrive in File Explorer

Added landscape mode for SMS app

Sunrise / sunset in the weather app

Supports Google applications integrated

No useless Chinese bloatware applications

More free RAM due to less background processing

Combined flat style app icons for both system and third-party apps (e.g., unlike the official generic MIUI, the Play Store icon is also flat)

Advanced menu with colorful icons (not just like the official MIUI newsletters)

There are no Chinese characters under the full system

Mi Video, Mi Music, Mi Radio, Mi Scanner: No useless Chinese content

No possibility to lock bootloader accidentally with any xiaomi.eu version

Added real 26 language translations by official MIUI Fansites and MIUI Fans

Swipe the phone to activate the phone's right hand on the screen

T9 converter support added

Screen-OFF animation added

GPS optimized settings for the EU

Optimized Battery consumption

Optimized RAM consumption

Theme item edit mode

Deodexed
Mi Globe ROM
avatar.png

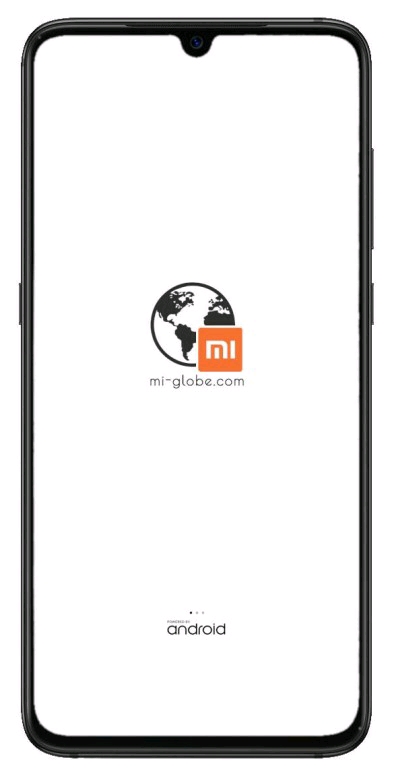
MiUI Mi GlobeROM is an unofficial proprietary software available for the latest Xiaomi Smartphones. Xiaomi.Eu, which already has a lot of excellent optimization, is based on multilingual ROM!

MiUI Mi globeROM basic Features:

Support for init.d startup scripts

Zipaligned APKs on every boot

Battery Tweaks

Performance Tweaks

RAM Tweaks

Clean UI

Chinese Applications Removed

Faster GPS Correction

3-Way Restart Menu (Recovery and Bootloader added)

CPU and Thermal Tweaks
Masik X 13.0
avatar.png

SYSTEM
Added multi-function firmware installation option using Aroma Installer for most devicesFull localization of firmware, high-quality translation of applications, graphic layers and widgets to Russian Built-in global Hi-Fi audio engine to replace standard, codecs for better sound processing System optimization realized, structured parameters for better interface performance and response speed Removed Chinese apps, collection and submission of anonymous statistics services, analysis services and dependencies Original media content (application resources, audio content, visual content) replaced by writing For maximum perception of the interface in all system applications Font optimization Added ability to manage system performance scenarios in power settings. Correct ad blocking is used, which does not affect important Internet resources. The maximum threshold for the volume level and the volume of the headphones has been increased. Previews of task manager apps and rounded corners in pop-up menu windows Added ad resources and recommended pages from all system apps Added expanded icon pack (number of supported apps: 5500) Instantly take screenshots when you press “Volume Down” keys saturation (Super AMOLED style) Masik Material layout for Dark Mode
AOSP (Android Open Source Project) Custom Roms
Lineage OS (L-OS);
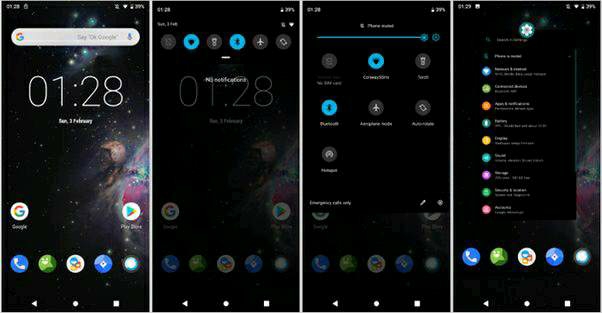
avatar.png

is a ROM developed as part of an Android AOSP (Android Open Source Project). This rom, created for more than 50 devices, is said to have millions of users worldwide.
With the advent of HTC Dream (T-Mobile G1), the first official Android mobile in 2008, hackers found a way to gain root access to the system. Thus CyanogenMod, the first Custom ROM, still popular today, was born.
Lineage OS ROMs have two basic versions: Stable (stable) and "nightly structures" (unstable). Nightly structures are based on the latest Android source code and are updated daily. Unlike the stable structure, nightly structures may contain bugs as well as not support all features in your pocket or tablet. If you want to have a system that works without problems instead of trying the latest functions, you should prefer "Stable", that is, stable structures.
Personalize Android more
Lineage OS may not look very different from Android (also known as stock ROM) at first glance, but many functions are hidden in settings, from simple theme changes to deep system settings. For example, you can choose a different color for the LED warning light for different applications, edit the status bar, and edit the lock screen. Another useful function offered by Lineage OS is the ability to switch to different profiles depending on your location. In this way, you will not have to enter and exit the settings frequently and change the sound settings.
Applications specific to Lineage OS
Custom ROM comes with a number of interesting applications. For example, audio and music enthusiasts can adjust their audio frequency levels as they wish with DSP Manager, a system-wide equalless tool. Lineage OS Mod also allows you to regulate the highest volume that can be released from your phone. Other additional features include Trebuchet, the Cronus widget (an advanced clock), the Apollo music app, and a file manager.
What are the Advantages of Lineage OS?
It allows your phone or tablet to use less ram.

It provides more efficient battery life.

Your phone helps you back up all your files.

Makes your phone or tablet much faster.

Allows you to experience pure Anroid.

Provides more storage space.

By removing unnecessary files in the system, system files are provided to be Maximum 200-300 mb.

Allows you to reduce permissions on the applications you install.

It allows you to use the latest Android version.

Lineage OS brings many innovations that we cannot count yet!


Resurrection Remix Rom (RR) avatar.png


It is based on L-OS and the installers need to use this ROM for at least 2 weeks… for a few days to make all the fine adjustments and the remaining time to reach the full performance of the Rom in general….
RR Rom's especially Gpu acceleration is very successful and screen transitions are exceeded.
It is a custom android rom that creates psychological problems with its enormous mixed settings part .. so there are so many options that it takes weeks to examine and decide all of them.
Some of its features:
Clock customizationsSetting the Left / Center / Right Clock PositionDouble-click the Status BarWake up with double click on the screenAdding an Internet SpeedometerAdding RR and many logos to the status barSystem boot animationsMenu animationsTransition animationsTaking screen shots with 3 finger swipingOmniSwitch feature (S6 and S7 Edge feature)Setting lock screen shortcutsCapture screen videoOTG SupportCamera shutter sound on / offTurn on the camera with a double click of the Power buttonSet fonts and sizesand more tons of editing ...

Paranoid Android avatar.png
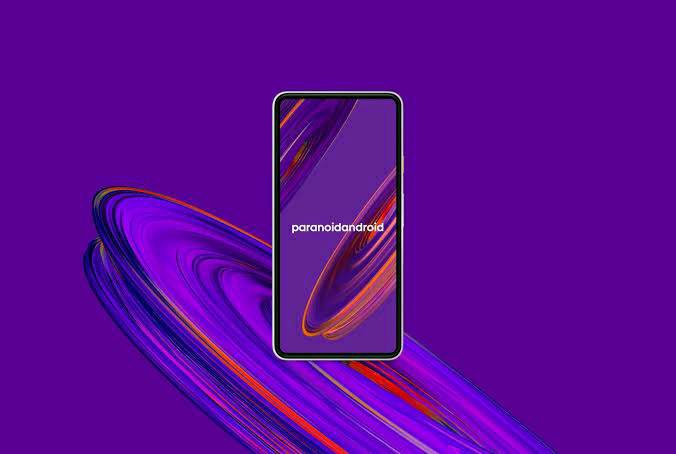
Paranoid Android, which has features very similar to CyanogenMod, is among the stable working numbered Roms. With two different features called Hybrid Mode and Pie Control, you can determine how applications will work in Paranoid Android. You can use the notification center called Pie Control in the ROM where you can close the notification bar completely. Pie Control, which has a different design, allows you to perform all your operations on a round menu.
Lineage-OS or AOKP (Android Open Kang Project)? Both ROMs offer many identical functions, so which one is a better Custom ROM has often been discussed in the Android community. In both ROMs, you can change the color of the LED warning light for each application, add new items to the drop-down menu when you press the power button, change the processor speed, and more.
AOKP has a release plan similar to Lineage-OS. In addition to the structures compiled every 1-2 weeks, more stable structures are published every few months.
Strong personalization
When we look at the details of AOKP, the power of the functions of customizing the menu bar draws our attention. In addition, you can "kill" the application or open the alert bar automatically, for example, by holding down a certain button for a few seconds while in any application.
With the "Statusbar brightness slider" function, it is possible to change the screen brightness by moving your finger on the top of the screen. The "Show notification count" function allows you to see the number of your accumulated alerts at once.
Another interesting feature, "Dual Panel" allows you to see the system settings in two columns on widescreen mobiles or tablets. However, this option is not as comprehensive as the Hybrid Mode in Paranoid Android.
Pixel Experince avatar.png


No customization is the purest version of android google phones software is pure android both serial and robust


I tried all MIUI based rum on my deviceRight now, except for stock roms, other MIUI based roms are actually almost identical .... I am using Mi Globe, which I have found smoothly in the last 3 weeks .... Looking at the features I am most curious about and what I can recommend to everyone, EPIC Rom MİUİPRO Rom .... and if you are an AOSP based rom fan, I would definitely recommend using RR Remix, which is number 1 among Custom Roms (I have used it for years)

I think if you read this enough, you will learn something, if you do not read it, you know it :)Those who want to try and wonder about the roms can search the internet. I would add the links, but the issue has been extended.
Mi Flash ve Fastboot Rom Kurulumu ve Anti Rollback Kontrolü


Miflash ile Fastboot Rom Nasıl Kurulur


BOOTLOADER kilidi açık olmalıdır.Windows 64 bit işletim sistemine ve Usb 2.0 usb portuna sahip Bilgisayara ihtiyacınız vardır.Bu işlem Telefona Orjinal Rom yükleme adımlarıdır ve herşey silinecektir. Yedeklerinizi almayı unutmayın.Bilgisayar'ınız da Adb ve Quallcom Driverları yüklü olması gerekmektedir.
Bilgisayar'a Driver kurulumu içindir. Kurulmazsa root ve rom işlemleri için bilgisayar telefonu görmez.
1 - 15 saniyede Adb driver programını indir.Programı "Yönetici Olarak Çalıştır" ve gelen mavi ekranda klavyeden "Y" tuşuna bas enterla. Tekrardan "Y" tuşuna bas. 2-3 defa uyarı verecek ve "Y" tuşuna basacağız en son bir yükleme yapacak ileri deyip, Son butonuna tıklayacağız. Adb driveri yüklenmiştir.
Quallcom driver'ı açıp, bilgisayarda normal bir program yüklemesi yapar gibi yükleyebilirsiniz.

15 saniyede adı driver
qualcom usb driver
Mi Flash ile Rom Yükleme
Mi Flash Türkçe aracını indirip kurunuz. Buraya tıklayarak indirebilirsinizSol üstte Driver butonuna basıp Driverları yükleyiniz.Yerel Disk C' de rom adında bir klasör oluşturunuz.( rom Küçük harfler ile )Cihazınıza ait Global Fastboot Rom dosyasını indiriniz. İndirdiğiniz Fastboot rom .tgz uzantılıdır, bunu Rar programı ile açıp klasör şeklinde çıkacak vaziyette Rar'dan çıkarıp, (veya Rar, 7zip gibi program yüklüyse direk rom dosyasına sağ tuş yapıp "Buraya Çıkar" da diyebilirsiniz )Çıkan romun klasörünün içindeki tüm dosyaları Yerel Disk C' de oluşturduğunuz rom klasörünün içine atınız.

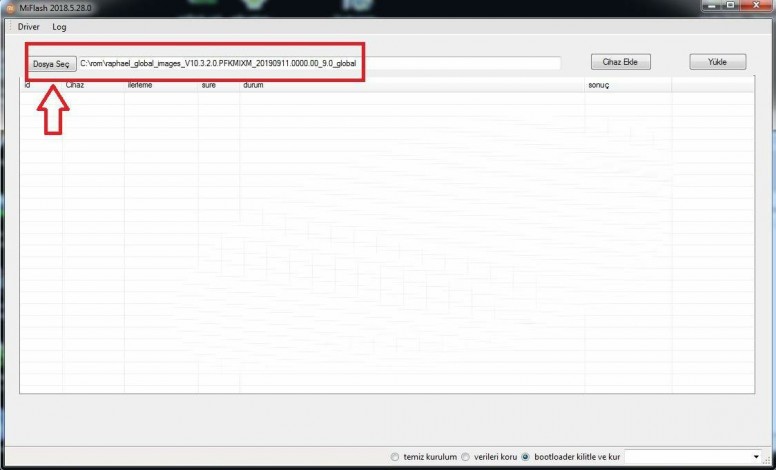
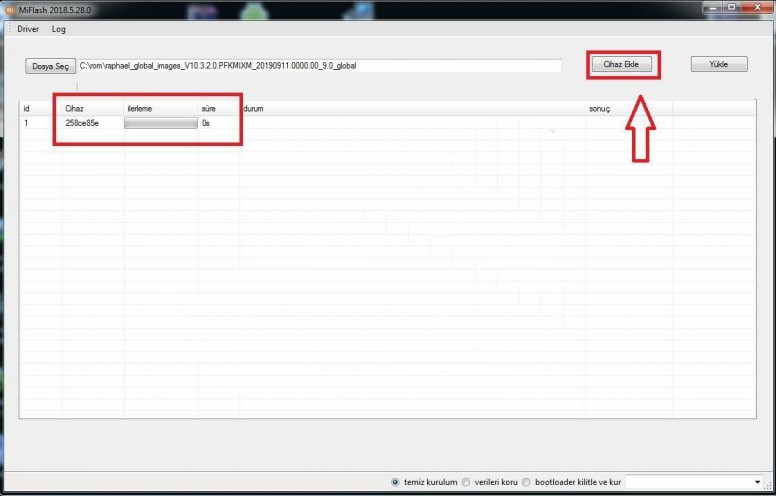
Mi Flash programını açınız " Dosya Seç " butonundan Yerel Disk C:\ nin içindeki rom dosyasını gösterip seçiniz. avatar.png

Telefonu Fastboot moduna alıp Usb kablosu ile bilgisayara bağlayanız. ( Ses Kısma ve Güç tuşuna basılı tutarak Telefonu Fastboot moda alabilirsiniz)Mi flash programında " Cihaz Ekle" butonuna tıklayınız. Program telefonunuzu seri numarası ile görecektir avatar.png

Alt kısım da " Temiz kurulum " seçeneğini seçiniz.
" Yükle " butonuna tıklayınız
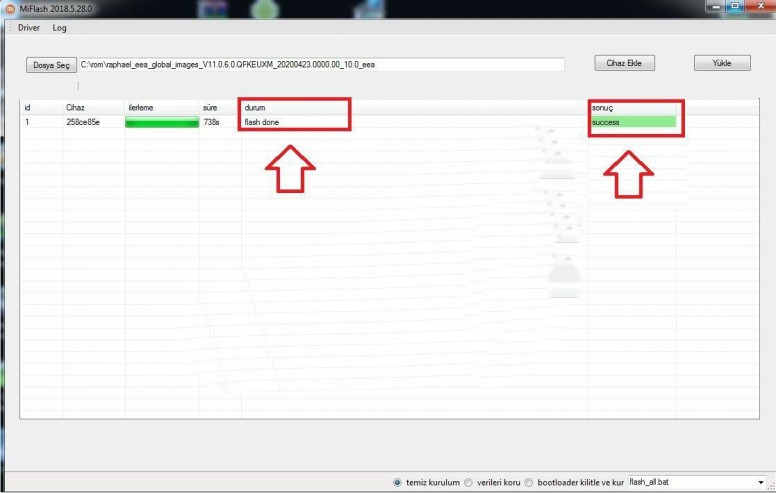
Yüklemenin bitmesini bekleyiniz. Yükleme bittiğinde Telefonunuza Fastboot rom yüklenmiş olacaktır. avatar.png
Önemli
Sürüm düşürme yapacağınız durumlarda mutlaka Anti-Rollback kontrolü yapınız.( Nasıl olduğu ne olduğu aşağıda anlatılmıştır)
Bootloader kilidi açık cihazlarda, BL kilidinin kapanması telefonu brick yapacağından dolayı Mi Flash Tool programının alt kısmında yer alan seçeneklerden CLEAN ALL seçeneğinin seçili olduğundan emin olun.CLEAN ALL AND LOCK seçeneği BL kilidinizi kapatır ve cihazınız brick olur.
Yükleyeceğiniz yazılımın fastboot yazılım olduğundan emin olun.
Cihazınıza uygun fastboot rom için tıklayın

ANTİ ROLLBACK
Arkadaşlar Xiominin sitesinde yaptığı

Kod: avatar.png
ROM'u güncellemeden veya güncellemeden önce, ÇOK önemli bir şey var .
1. Çin pazarı için üretilen Xiaomi Telefonları MIUI Global ROM'u çalıştıramaz.2. Global pazarlar için üretilen Xiaomi Telefonları MIUI Çin ROM'unu çalıştıramaz.
Resmi veya yetkili satış kanalları aracılığıyla Xiaomi Telefonları satın almanızı ve yanıp sönmeden veya güncellemeden önce sistem bilgisini iki kez kontrol etmenizi öneririz.
Anlayışın için teşekkürler.
Bu duyurudan sonra bazı geliştiricilerde Anti-Rollback cihazlarının artacağı konusunda kuşkular başlamış ve sürekli güncelleme yapan kullanıcılar(Özellikle Resmi sürüm kullanıcıları) Anti-Rollback a düşmeden önce alınabilecek önlemleri ve cihaza güncelleme yapmadan önce mutlaka aşağıdaki işlemleri yapmayı tavsite etmişler.
1. İlk olarak bu işlemi yapıyoruz.
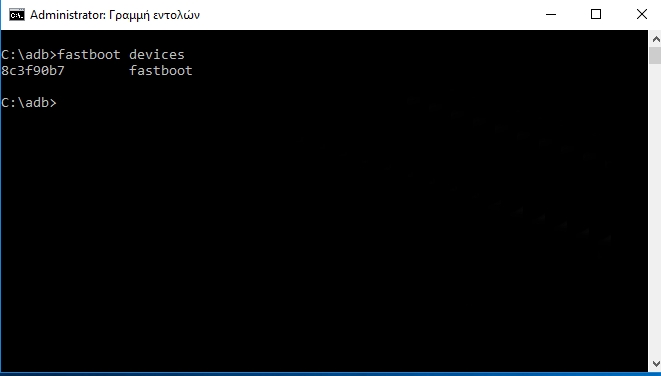
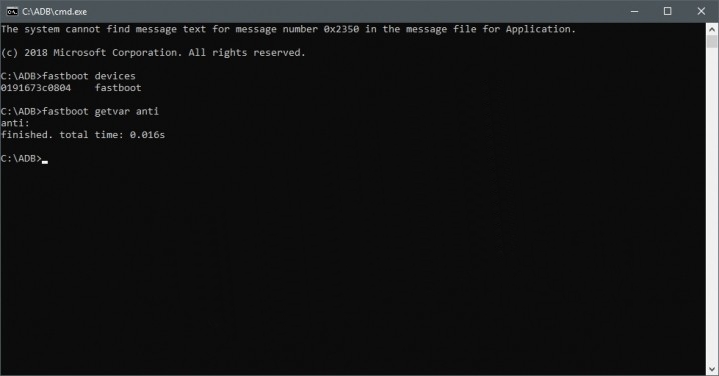
Bilgisayarda ADB sürücüleri yüklü olmalıTelefonu fastboot moduna alıyoruz(Cihazı kapalıyken ses kısma güç tuşu).Telefonumuzu bilgisayara bağlıyoruz. Usb girişlerinden mümkünse usb 2.0 yani siyah olana bağlayalımBilgisayarımızdan komut sistemini çalıştırıyoruz(shift sol klick veya başlat çalıştıra "cmd" komutunu yazıyoruz)Açılan pencereye "fastboot devices" yazıyoruz. Sürücülerimizin yüklü olup olmadığını anlamak için avatar.png


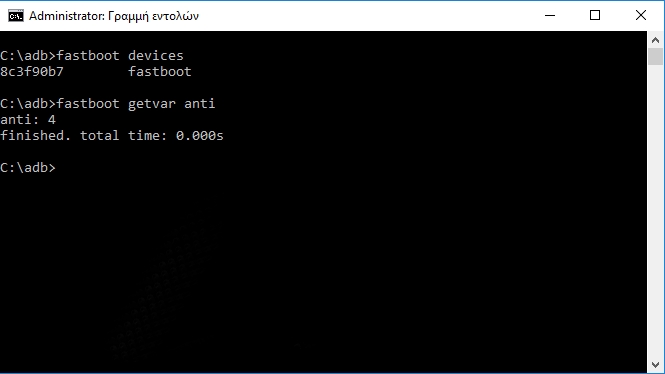
Sonra "fastboot getvar anti" komutunu giriyoruz.Eğer böyle bir ekran gelirse ve "anti: 4" görürseniz cihazınız malesef Anti rollback. avatar.png

anti: 3" görürseniz cihazınız normal"anti: 2" de birkaç forumda normal olarak görülmüşEğer herhangi bir sayı göremezseniz cihazımız yine normaldir avatar.png

işleme devam ediyoruz
1. Cihaz modelinize uygun yeni güncellemeyi Resmi sitesinden indirin. Örneğin 20.2.6 sürümündesiniz ve 20.9.13 sürümüne geçeceksiniz. 20.2.6 sürümünde iken yukarıdaki 1. numaralı işlemi yapıyorsunuz. Sonra resmi siteden 20.9.13 ü ( kararlı yüklicekseniz stabil versiyonu, beta ise developer versiyonu) indirip aşağıdaki işlemlere devam edeceksiniz
2. İndirdiğiniz Romu zipten çıkarıp flash all.bat dosyasını Notepad   gibi bir metin düzenleyicisi ile açın.(Sadece flash all.bat dosyasını da çıkarabilirsiniz)
3. Açtığınız dosya içinde bu kodu aratınKod:set CURRENT_ANTI_VER=#
Bu numara (#), cihazınızda flaş yapmak istediğiniz MIUI ROM geri alma (Anti) işaretleyicidir.Bu numara, 1'inci işlemde cihazınızda "fastboot getvar anti" kodu ile bulduğunuzdan daha büyük veya ona eşitse, Romu cihazınıza Twrp veya MiFlash ile sorunsuz kurabilirsiniz.Eğer bu sayı cihazınızda bulduğunuzdan daha azsa, ROM'u TWRP Recovery'den flaş yapmayın. Çünkü sadece cihazınızda Brick ile sonlanacaktır.


RECOVERY ÜZERİNDEN ROM YÜKLEME REHBERİ


H62vVyU6Md3gBogs7T.gif

Kullandığınız ROM dan bıktınız, başka ROM ' a gönül sardınız vs. Bu yüzden farklı bir ROM kurmak istiyorsunuz. İşte yapmanız gerekenler....


ÖNCELİK OLARAK CİHAZINIZIN BL KİLİDİ AÇIK OLMALI RECOVERY NASIL YÜKLENİR KONUSU İÇİN TIKLAYIN


1 - Kurmak istediğiniz ROM ' u indirip telefonunuzda SDCARD atıyorsunuz.


1592678581005.jpg

2 - TWRP yi açıp Full Backup almanız gerekiyor ki kurduğunuz uygulamalar, resim-müzikler vs kaybolmasın. TWRP yi açıyoruz . Backup u tıkladıktan sonra SADECE ŞU SEÇENEKLERİ ! işaretliyoruz: Boot, Cache, Recovery, System, Data ( excl. storage ), EFS System Image işaretli olmayacak )


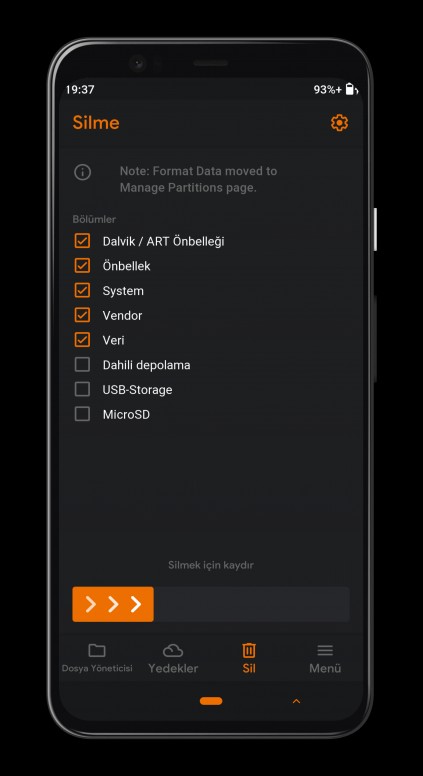
3 - Geri ana ekrana geldikkten sonra Wipe - Advanced Wipe yi tıklıyor ve SADECE ŞU SEÇENEKLERİ ! işaretliyoruz : Dalvik / ART Cache, Cache, System, Data, VENDOR, VERİ Internal Storage ve USB-OTG işaretli OLMAMALI )
1592678615254.jpg
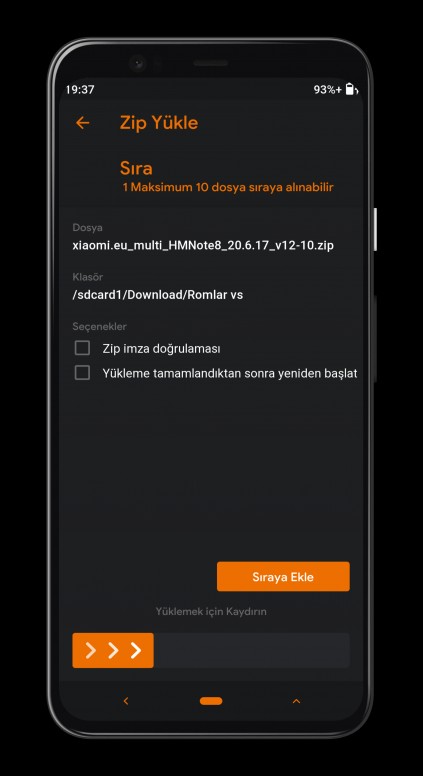
4 - Ana ekrana geliyor Install a tıklayıp SD card attığımız yeni ROM u seçip aşağıdaki Swipe to confirm Flash düğmesini sağa kaydırıyoruz.
1592678591060.jpg

NOT: ROMU FLASH ETTİKTEN SONRA FORMAT DATA YES YAPARSANIZ TEMİZ KURULUM YAPMIŞ OLURSUNUZ SORUNSUZ ROMUNUZ OLUR

1592678606037 (2).jpg 1592678634583.jpg

5 - Ana ekrana geri dönüyoruz. Restore düğmesine tıklıyoruz. ve En son aldığımız Yedeğin üzerine tıklıyoruz. Açılan seçeneklerden sadece Data ( excl. storage ) yi seçiyoruz ( Boot, Recovery, System, EFS SEÇİLİ OLMAYACAK ! ) ve Swipe to Restore düğmesini sağa kaydırıyoruz.
1592678644346.jpg
6 - Telefonun ana hafızasına MAGİSK kopyalayıp ( Root istiyorsanız ) Ana ekrana geliyor Install düğmesi ile bu sefer Magisk seçiyor bu dosyayı kuruyoruz...
1592678606037 (1).jpg
7 - Ana ekrana geri dönüp sırası ile Reboot - System dedikten sonra yeni ROM 'unuzu kullanmaya başlıyorsunuz....

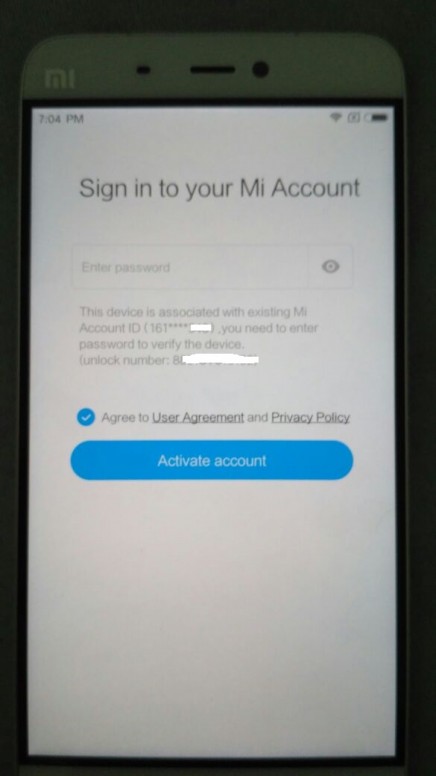
Xiaomi Miui Hesabı Şifresini Unutursanız Ne Yapacaksınız ?Önerilen


source.gif

MERHABA Mİ FANLARI
Biliyorsunuzki XİAOMİ Telefonlara bootloader kilidi koymak ile başladı , sonra edl rom yüklemeyi de kapatarak , en sonunda da mi hesabına telefonumu bul seçeneğini ekliyerek güvenlik olayını iyice arttırdı..
Telefona bir sebebten dolayı telefona giriş yapamazsanız işiniz zor.
Bugün mi hesabı şifresini unutursanız ne yapmalıyım sorusuna cevap bulamaya çalışacağız...

Eveet , birgün telefonu fabrika ayarlarına sıfırladınız 4-5 dakika sonra telefon açıldı o da ne şifre soruyor size ....
Hatırlayamadınız mı ? giriş yapmayı da unutun o zaman..
WhatsApp-Image-20160621 (1).jpg


Size lazım olan şifre mi hesaplarında duruyor merak etmeyin...
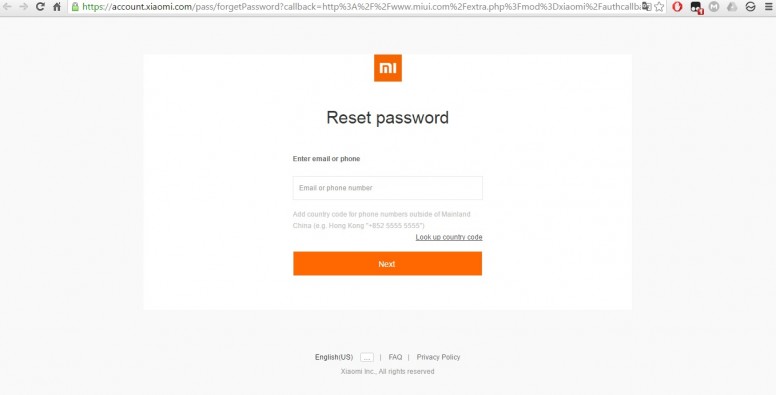
İlk yapmamız gereken Mi Hesap şuradaki linke tıklayarak şifremi unuttum sayfasına gitmeniz.


test (8).jpg
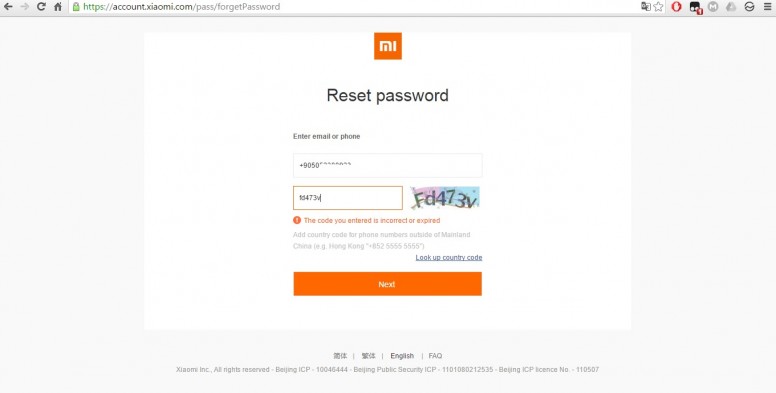
Burada karşınıza hesabınızda kayıtlı olan e-mail yada telefon no seçeneklerinden birini seçmek çıkıyor.
Örneğin telefon no seçtiniz ;
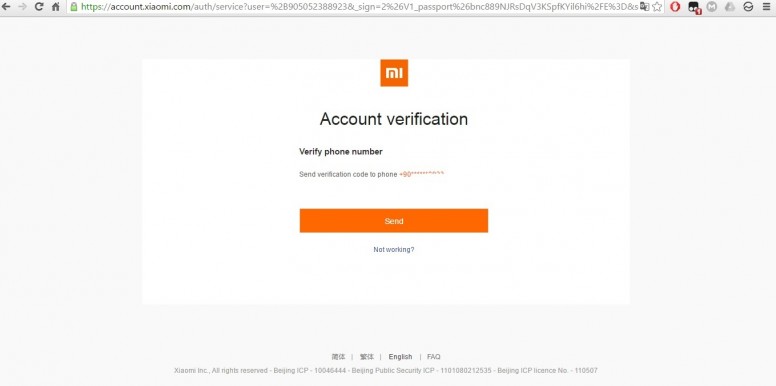
test (8) (1).jpg Telefon numaranızı ve doğrulama resmindeki kodu girmelisiniz sonra onay sayfası karşınızda ;
test (8) (2).jpg
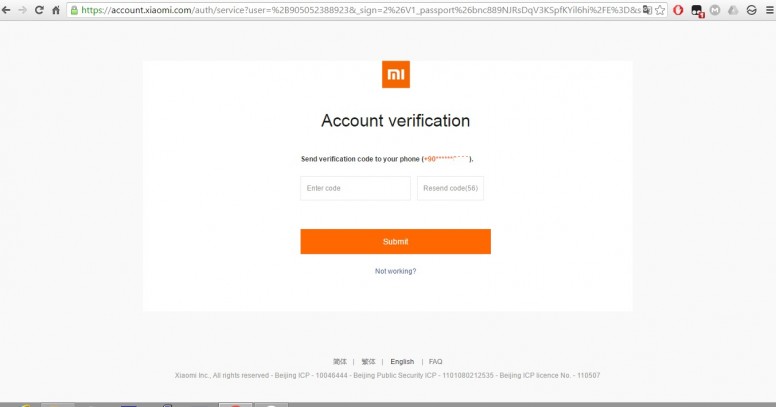
Son olarak karşınıza şifre sıfırlama onay kodunun telefonunuza gideceği sayfa karşınızda.
Next diyerek telefonuza sıfırlama kodu gönderiliyor.
test (8) (5).jpg
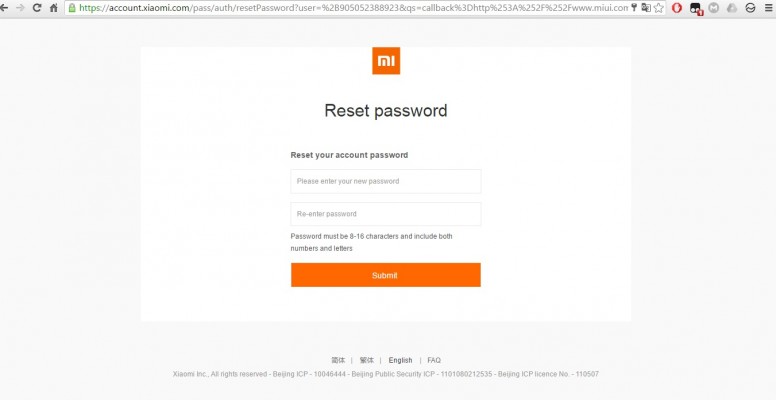
Gelen sıfırlama onay kodunu bu sayfaya girdiğinizde sizi şifrenizi yeniden belirliyeceğiniz sayfaya yönlendiriyor.
test (8) (6).jpg
Burada yeni şifrenizi yazarak onaylıyorsunuz.
Tebrikler artık Xiaomi telefonunuza yeni şifre ile giriş yapabilieceksiniz :)
Hesabınıza e-mail kayıtlı ise bu e-mail adresini kullanarak da şifrenizi kurtarabilirsiniz.


Parmak İzi Okuyucu ve Sensör Sorunları Çözümü ( İçeride )


giphy.gif

MERHABA Mİ FANLARI


Bu konu ile alakalı birçok paylaşım bu sebebten bu konuyu açma gereğiduydum parmak izi kaybolması telefonla konuşurken ekranın sürekli  açıkolması telefonu kulağımızdan uzaklaştırınca hala karanlık olması geçaydınlanması vb. sorunları görüyorum bunun iki çözümü  var ya garantiyegönderip persist img yüklenmesini isteyeceksiniz yada kendiniz yapacaksınızeğer bu konular hakkında bilginiz yoksa servise vermeniz daha makbuldür


Şimdi size kısaca açıkladıktan sonra nasıl yapıldığınıaktaracağım bunun için bl kilidi açık uygun güncel twrp tarzı recovery kuruluolmalı riskler size aittir micominity ve şahsım sorumluluk kabul etmez


Persist Neden Yüklenir?


Telefondaki sensörler çalışmıyorsa, çağrı esnasında telefonu kulağınızagötürdüğünüzde ekran kapanmıyorsa, Wifi/Bluetooth hata veriyorsa, kamera netfotoğraf çekmiyorsa, parmak izi okuyucusu çalışmıyorsa vb. durumlardacihazınıza persist flashlamanız gereklidir.


Persist Dosyası Nasıl Bulunur?


Gerek forumumuzda gerekse farkl sitelerden cihazınız için persist dosyasınaulaşmanız mümkündür fakat en sağlıklı yol persist dosyasını orijinal romiçerisinden kendinizin almasıdır.


adresinden indireceğiniz .tgz uzantılı fastbootrom dosyasının üzerine sağ tıklayarak klasöre çıkartın.


Çıkarttığınız klasör içerisinde yer alan images klasöründe persist.imgadında dosyayı görebilirsiniz. Bu dosya sizin cihazınıza ait persistdosyasıdır.

giphy (1).gif

Persist Dosyası Nasıl Yüklenir?


Persist dosyasını yükelemek için iki adet yol bulunuyor. Her ikisi için detelefonunuzda bootloader kilidinin kaldırılmış olması gereklidir.


Birinci yol daha sağlıklı ve kesindir.


Bu işlemi yaparken bootloader kilidinizi kaldırmış olduğunuzbilgisayarı kullanırsanız driver sorunlarından kaçınmış olursunuz. Eğer farklıbilgisayar kullanacaksanız


adresinden indirebileceğiniz Mi Flash Tool aracını veya


adresinden indireceğiniz Mi Unlock Tool aracını yüklemeniz halinde driverlar cihazınıza kurulacaktır.


Öncelikle minimal adb and fastboot bilgisayarınızayükleyiniz.


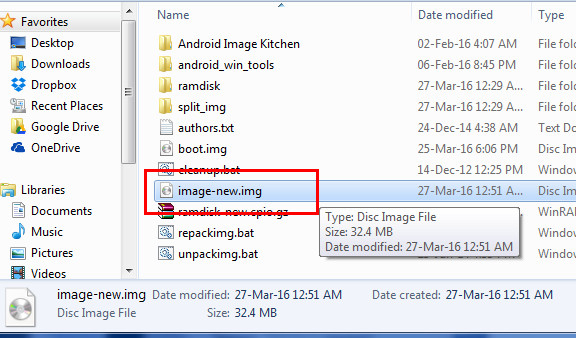
Varsayılan kurulum konumunu değiştirmediyseniz C sürücüsü içerisinde yer alan Program Dosyaları (x86) klasörü içerisinde Minimal ADB and Fastbootklasörü oluşacaktır. Bu klasörün içerisine biraz önce bulmuş olduğumuzpersist dosyasını kopyalayın.

image-new-img-file.jpg

Bu aşamada a veya b'den herhangi birini yapmanız yeterlidir.


a - Daha sonra USB hata ayıklamasını açtıktan sonra telefonunuzubilgisayarınıza bağlayın ve açılan ADB penceresinden sırasıyla aşağıdakikomutları verin. (Bu aşamada telefonunuzda yetkiistenirse onaylayın)

Kod:

adb devices

adb reboot bootloader

fastboot devices

fastboot erase persist

fastboot flash persist persist.img

fastboot reboot

b - Telefonunuzu kapatın. Ses kısma ve Güçtuşlarına beraberce basarak açın. Telefon ekranınızda fastboot yazısını gördüğünüzde bırakın ve telefonunuzubilgisayarınıza bağlayın. Açılan CMD penceresindenaşağıdaki kodları girin.

Kod:

fastboot devices

fastboot erase persist

fastboot flash persist persist.img

fastboot reboot

Geçmiş olsun persist dosyasını yüklediniz. (erasekomutunda hata alırsanız bir sonraki komutla devam edebilirsiniz.)


İkinci Yöntem


İkinci yol için ise img yüklemesini destekleyen birTWRP'ye ihtiyacınız var.

Eğer TWRP'niz destekliyorsa persist.img dosyasınıtelefonunuza kopyalayarak yükle/imaj/img yükle seçeneği altından bu dosyayıgöstererek yükleyebilirsiniz.

TWRP yönteminin başarısız olma nedenleri arasındaen sık karşılaştığımız sıkıntı uyumsuz TWRP kullanılması. Her cihaz için farklıTWRP sürümlerinde sorun olması sebebiyle direk olarak şu TWRP sürümünü kullanınyazamıyorum ancak cihazınızla ilgili forum bölümünden uygun TWRP sürümüneulaşabilirsiniz.

Bu yöntemi kullanacaksanız bir diğer dikkat edilmesi gerekennokta ise eski persist dosyasını silmeniz gerekli.

Wipe(Temizlik)/AdvencedWipe(Gelişmiş Temizlik) seçeneği altından eski persist dosyanızı silerek yenidosyayı yükleyebilirsiniz.


Akıllı Telefonlar Nasıl Şarj Edilmeli?


ddd-696x366.gif

MERHABA Mİ FANLARI

Akıllı  telefonların kullanım sıklığının artması, batarya problemini de  beraberinde getiriyor. Donanım olarak gün geçtikçe daha iyi hâle gelen  cihazlar, ekran boyutlarının gitgide büyümesi, mobil cihazlar için  üretilen oyun ve benzeri içeriklerin akıllı telefonların performansını  sonuna kadar kullanması gibi nedenlerden dolayı batarya sorunları  yaşayabiliyor. Günün her anı cep telefonlarının şarj edilebileceği bir  ortam bulamayan kullanıcılar, ihtiyaç duydukları bir anda akıllı  telefonlarından yararlanamayabiliyor. Batarya kapasiteleri, türleri,  üretimlerinde kullanılan teknolojiler, daha uzun süre dayanacak piller  için belirleyici olsa da cep telefonlarının gelişim hızıyla bataryaların geliştirme süreçleri aynı oranda olmuyor. Bu durum da akıllı  telefonlarımızın bataryalarından nasıl tam performansla  yararlanabileceğimiz sorusunu akıllara getiriyor.
Akıllı telefonların bataryalarının daha uzun süreli kullanımı için neler yapmamız gerektiğini birlikte inceleyelim.


Telefonumu Ne zaman Şarj Etmeliyim?
back-to-the-future-flux-capacitor-charger-1.gif

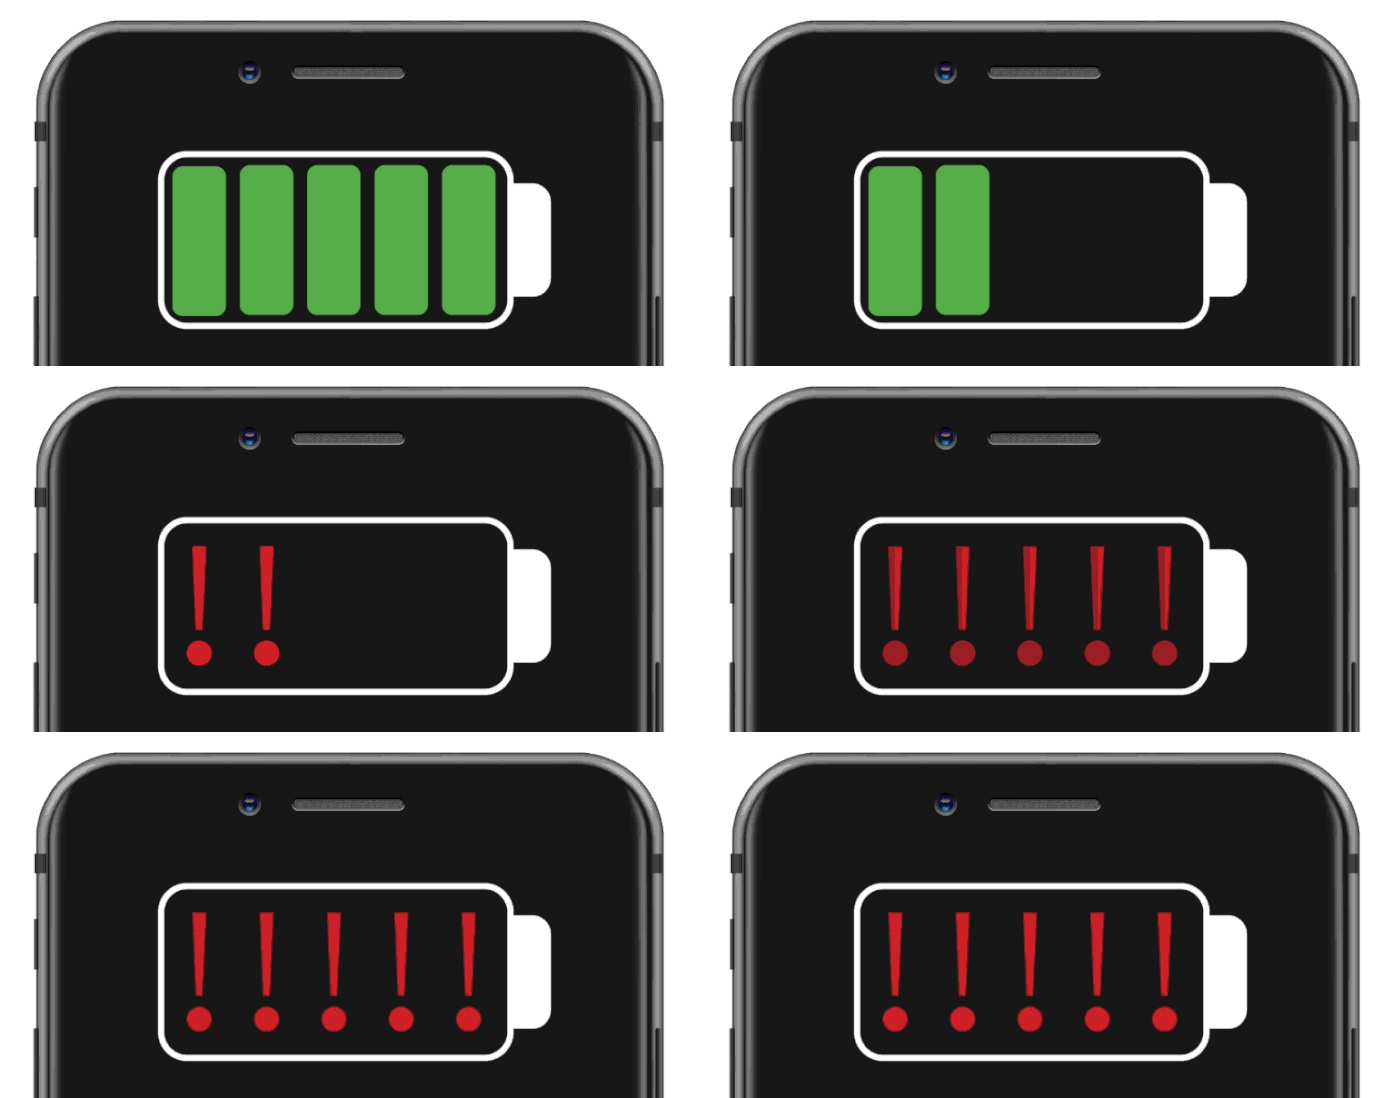
Pilinizin yarısından fazlası boşaldığında telefonunuzu şarja takmak ve bunu gün  içerisinde birkaç kez tekrarlamak, bataryanızın performansını artırıyor.

Akıllı  telefonlarda en fazla kullanılan batarya çeşidi, Li-ion bataryalar  olarak karşımıza çıkıyor. Bu bataryanın yapısı gereği en verimli kullanım, telefonların şarjını yüzde 50’nin üzerinde tutmaktan geçiyor.
Bu noktada akıllı telefon bataryalarının sonuna kadar şarj edilmemesine  dikkat edilmesi, önem taşıyor. Yüzde 100 doluluğa ulaşan piller, şarj  akımını kesip güvenlik açısından bir sıkıntı oluşturmasa da bataryaların uzun vadeli kullanım ömrüne olumsuz etki yapıyor. Kapasitesi ne olursa  olsun bir bataryanın ortalama ömrü, 300 ile 500 tam şarj civarında  oluyor. Bataryaların yüzde 100 şarj edilmesi, ömrünün azalmasına neden  oluyor.


Bu bilgilerden hareketle akıllı telefonların şarjının, yüzde 20 ile yüzde 80 arasında bulunması ve telefonu şarja takacağımız zamanı bu aralıklara göre  belirlememiz, en ideal batarya performansını ortaya koyuyor. Her ne  kadar akıllı telefonların günlük kullanımda tam şarjı önerilmese de ayda bir kez tamamı boşalmış bir bataryanın yüzde 100’e kadar şarj edilmesi, faydalı olarak görülüyor. Bu tarz bir şarj uygulaması, bataryanın  ayarlarının sıfırlanması olarak değerlendiriliyor. Böylelikle pilin şarj durumuyla ilgili daha sağlıklı bilgi elde ediliyor.

Hızlı Şarj Özelliğini Kullanmalı mıyım?

Akıllı  telefonların batarya kapasitelerinin artmasıyla telefonları şarj etmek  için ihtiyaç duyulan süre de artmaya başladı. Bu durumun önüne geçmek  isteyen üreticiler, hızlı şarj sistemlerini getirerek telefonların daha  kısa sürede şarj edilebilmesine kapı araladı. Qualcomm, şarj  teknolojisinde Quick Charge sistemini tercih ederken Samsung, Adaptive  Fast Charging ismiyle patentini aldığı hızlı şarj özelliğini kullanıyor.

Hızlı şarj sistemini destekleyen cihazlarda güç yönetimini düzenleyen bir çip sayesinde normalden daha hızlı şarj imkânı doğuyor.

PMIC ismindeki bu çip, şarj cihazından daha fazla akım talep ederek birim  zamandaki şarj süresini kısaltmış oluyor. Kullanılan batarya, şarj  cihazı, şarj kablosu ve işlemi yöneten çip, şarj süresinde belirleyici  oluyor. Fakat bataryaya birden yüksek akım geldiği için tavsiye  etmiyoruz.


Elektronik cihazların sıcak ortamlarla arası iyi olmadığı gibi bu durum,  bataryalarda da kendisini gösteriyor. Doğrudan güneş alan yerlerde,  yüksek sıcaklığa maruz kalınabilecek alanlarda cep telefonlarının  bırakılmasından kaçınmak gerekiyor. Sürekli yüksek sıcaklık altında  çalışan akıllı cep telefonlarının bataryaları, uzun vadeli kullanımda ciddi problemler meydana getirebiliyor. Sıcaklıkla arası kötü olan  pillerin çok soğuk ortamlarda da bırakılmaması, önem arz ediyor.  Cihazların kullanım kılavuzlarındaki ideal çalışma sıcaklığına dikkat  edilmesi, telefonların bataryalarını da olumlu yönde etkiliyor.


İstediğim Şarj Aletini Kullanabilir miyim?


Ampy-Hareket-Şarj-Cihazı-Cihazları-Şarj-Etmek-İçin-Hareketinizi-Kullanır.gif

Normal  şartlarda ideal şarj aleti, telefonunuzla birlikte gönderilen cihaz  olarak karşımıza çıkıyor. Her markanın kendi şarj teknolojisi  düşünüldüğünde en verimli şarj işleminin orijinal şarj aletleriyle  gerçekleştirildiği açıkça anlaşılıyor.


Düşük kaliteli şarj aletlerinin, bazı telefonların bataryasının yanmasına ya da patlamasına yol açtığını akıllardan çıkarmamak gerekiyor.


Bu tarz büyük bir hasar meydana gelmese bile doğru akım ve güçte şarj edilmeyen telefon bataryalarının problem çıkarma ihtimali, artıyor. Telefonla gelen şarj aletinin bozulması durumunda alternatif çözüm yolları arayanlar ise kendini kanıtlamış şarj cihazı üreticilerini tercih edebilirler. Üçüncü parti şarj cihazı kullanımlarında özellikle dikkat edilmesi gereken, şarj cihazının çıkış gücüyle telefonunuzun kullandığı hızlı şarj özelliğinin örtüşüp örtüşmediği konusu oluyor.

İhmal edilen unsurlardan birinin de telefonları şarj etmekte kullanılan kablolarla ilgili olduğu görülüyor. Bir kısmı data aktarımında da kullanılabilen bu kabloların hem veri aktarımında hem de şarj esnasında verim sağlayabilmesi için kaliteli olanlarını tercih etmek gerekiyor.
Daha çok eski telefonlarda kullanılan nikel tabanlı bataryalarda dikkatli olunması gereken başka özellikler de göze çarpıyor. NiMH ya da NiCd türü bataryalarda Li-ion bataryalardan farklı olarak, pilin tam boşalmasını bekledikten sonra şarj etmek, daha mantıklı bir seçenek olarak karşımıza çıkıyor. Çünkü bu tür bataryalar, şarja takıldıklarında mevcut şarj miktarını göz ardı ederek aslında tam olarak dolmadıkları hâlde yüzde 100 doluluk oranı gösterebiliyor. Bu duruma bataryalardaki “hafıza efekti” deniyor. Uzun yıllardır neredeyse bütün akıllı telefon üreticilerinin lityum pillere geçtiği düşünüldüğünde büyük ihtimalle bu olumsuzluk, sizi etkilemeyecektir.
Bazı kullanıcılar, yedek batarya ya da telefon kullanmayı tercih edebiliyor. Bu tür durumlarda Li-ion bataryaların boş ya da boşa yakın bir şekilde saklanmasından kaçınılması gerekiyor. Hiç açılmayan bir telefondaki batarya bile ayda yüzde 10’a kadar enerji kaybedebiliyor. Uzun süre şarjı boşalmış şekilde bırakılan bataryalar, bir daha şarj olmama problemiyle karşılaşıyor. Sadece telefonlar için değil; bataryası olan bütün elektronik aletler için geçerli olan bu duruma dikkat etmek, sağlıklı bir kullanım için önem arz ediyor.


Sonuç olarak en doğru şarj etme şekli Li-on ve Li-po pillerde %20 ila %80 arasıdır. Mümkün olduğu sürece bu aralıkta tutmaya özen gösterin.

Peki siz cihazınızı nasıl şarj ediyorsunuz hangi sarjı kullanıyorsunuz bilgilerinizi ve tecrübelerinizi bizimle paylaşın lütfen


GCam Gece (Yıldız) Çekimi Astrofotografi nedir?


MERHABA Mİ FANLARI
Sizlere daha önce gcam konusu üzerinden bilgiler verdim gcam gün geçtikçe gelişen bir uygulama haline geldi Google yazılımcıları pixel 4 itibari ile gece moduna astrophotografi modu geliştirdi artık gece yıldızları çekebileceğiz ...

Astrofotografi nedir?
Astrofotografi gök cismi anlamına gelen "ASTRO" kelimesinden ve fotoğraflar için "FOTOĞRAF" kelimesinden oluşur. Astrophotography araçları gök cisimleri ya da uzayda parlayan gök cisimlerinin fotoğraflarini çekmeye yarar. Benzer konsept burada GCAM 'de uygulanmaktadır. Astrofotografi ile yıldızların vb. Fotoğraflarını çekebilirsiniz, ancak aynı zamanda harika Düşük Işık Çekimleri elde etmek için de kullanabilirsiniz.
Bazı gcam serilerinde astro modu direk gece moduna alıp astro modu aktif etmen için tuşlar çıkar ayarlardan çekim süresini pozlamayi istediğiniz gibi ayarlayabilir deneme yanılma yoluyla mükemmel resimler çekebilirsiniz.

Astrofotografi kullanırken dikkat edilmesi gereken noktalar:

1. Astrofotografiyi tetiklemek için Tripod Kullanmalısınız.
2. Astrofotografi bir elde taşınır cihazda tetiklenmez.
3. camera2api, cihazınızda aşağıdaki düzeylerden birinde etkinleştirilmelidir: Seviye 3, Tam, Sınırlı

GCAM'da Astrofotografiyi Etkinleştirme Adımları
Bazı gcam surumlerinde resimde ki gibidir


  • Google Kamera modunu yukarıdan indirin.
  • Android telefonunuza Gcam uygulamasını yükleyin ve başlatın.
  • Ayarlar menüsünü almak için aşağı kaydırın.
  • Ayarlar simgesine dokunun.
  • Sayfayı aşağı kaydırın ve “Geliştirici Ayarları” nı bulun. Bazı Gcam modlarında, geliştirici ayarları seçeneği “Hakkında” altındadır.
  • Geliştirici Ayarları altında aşağı kaydırın ve aşağıdaki seçenekleri etkinleştirin:


camera.cuttle.darken
camera.cuttle.extended
camera.cuttle.extended_iterable_burst

  • Kameranın ana kullanıcı arayüzünden Night Sight'ı seçin.
  • Şimdi, Astrofotografiyi etkinleştirmek için telefonunuzu çok sabit tutmanız gerekecek.
  • Tripodunuzu alın ve biraz Astrofotografi için dışarı çıkın!


Adda "CUTTLE" içeren tüm ayarları etkinleştirin. CUTTLE, Astrofotografi ile ilgilidir.

Gcam astrofotografi modu ile çekilen örnek resimler


Resimler xda formundan alınmıştır.

Şimdi telefonlarınız için gcam serisine aşağıda ki konudan ulaşabilirsiniz
Eğer cihazınız listede yoksa bu yada gcam konusu fark etmez yazın veririm ben


EFS ( IMEI ) Yedeği Alma


MERHABA Mİ FANLARI


Bir çoğumuz telefonlarımızda farklı romlar kurmayı atmayı deneriz severiz değişiklikleri bunun güzel yanları pek çoktur pek çok yeni özellikler kazanır telefonumuz bunun yanında cihaz da olmayan ek özellikler de gelmiş olur.

GEREKLİ OLAN BİLİNMESİ GEREKEN KONULAR AŞAĞIDA LİNKLERE TIKLAYIP OKUYUNUZ


MİSAL: Yüz tanıma olmayan bir telefona yazılım ile yeni rom yükleyerek recovery üzerinden yüz tanıma özelleiği kazandırabiliriz bu çok basit bir örnek tabi ki herşeyin bir riski olduğu gibi bu gibi işlemlerinde rsiki var biz ne yaparız recovery üzerinden hangi tür recovery kullanıyorsak telefonumuzun sistem efs boot vs yedeğini alır hafıza kartı otg yada pc de saklarız şimdi sizlere imei yedeklemekten bahsedeceğim.


TWRP recovery yada miflash işlemlerinde imei efs zarar görmesin diye yedek almak zorundayız olurda imei uçar ise yedeğimizi tekrar flash ettiğimizde sorun çözülür para verip  imei attırmaktan kurtulursunuz.


Efs yedeği almak için telefonumuzda twrp yüklü olmalıdır.
Cihazınızı kapatıp ses açma+güç tuşuna basılı tutarak twrp'ye alın.


Menüde "Backup" butonuna tıklayın.


Ve sadece "EFS" tikli olacak şekilde alt çubuğu kaydırın.


Yedekleme işlemi bittikten sonra "Reboot System" butonuna tıklayın cihazınızı USB kablo ile bilgisayara bağlayın ve dosya aktarımını seçin bilgisayardan cihazınızın hafızasına girip "TWRP" yazan klasörü bilgisayarınıza kopyalayın.


Doğal zayıflama - Yakın dövüş - Che masajı - Kronik ağrılar fıtık Sorunlarınız İçin Ulaşınız

Merhaba​ Doğal Zayıflama Che Masajı Yakın Savunma İstediğiniz bölge kısa sürede forma girer daha fit bir vücuda sahip olabilirsiniz. Doğal z...